

Love the idea of making a mini DIY herb garden so you can grow your own herbs this summer? We've got the perfect project for you to tackle this weekend.
You don't need lots of space for this mini DIY design, and the wooden board means it's easy to mount this on a wall in your kitchen, or on a garden fence if you’re using it outside.
If you've read our guide on how to create a herb garden, you might have already decided what herbs you want to grow in your new design. An alternative option is to put in trailing plants to create more of a living wall effect.
It's best to use a jar with a wide rim for easy planting and you’ll need a decent amount of soil depth for the roots. There's nothing to say that you couldn't add more than three jars too. As they're so easy to attach to the board there's really no limit to how many you could have in your mini herb garden. Keep reading for how to make this simple design.
How to make a mini DIY herb garden

You will need:
- 20x42cm piece of pine or plywood
- Tape measure
- Set square
- Pencil
- Junior hacksaw
- Sandpaper
- Chalk paint or exterior wood paint
- Paintbrush
- Wax or varnish (optional)
- Glass jars with 10cm diameter tops
- Bradawl
- Three wood screws (no longer than the depth of your wood)
- Metal hose clips to fit 10cm diameter
- Eye screws
- Screwdriver
- Hanging wire or strong twine
- Compost
- Herb seedlings or trailing plants
Step one: measure your wood
Measure, then mark to size your piece of wood using the tape measure, set square and pencil. Cut out with the hacksaw and sand off any rough edges or imperfections. We’ve recycled an old pine shelf for this project.
Paint the front of the wooden display with a coat of chalk paint or the best exterior wood paint. Allow to dry and then apply a second coat if needed. If you've used chalk paint, apply a finishing wax or lacquer to seal. Position the jars and wind up the hose clips to hold the jars securely in place.
Step two: arrange the jars on the board
Arrange the jars on the wood until you’re happy with their positioning. Mark the wood at the centre of each jar near the rim. Use a bradawl to create pilot holes for the wood screws. Unwind the metal hose clips to find the centre. Align the centre of each hose clip with the three pilot holes. Secure the hose clips firmly in place with the wood screws and screwdriver.
Step three: attach the jars to the board

On the reverse of the wooden board, screw in two eye screws at the top on either side. Tie some strong twine or hanging wire onto the eye screws for hanging.
Step four: plant the jars with herbs
Fill each jar with compost and the add your favourite herb seeds or seedlings to create your mini hanging garden. We like the idea of learning how to grow basil, mint, thyme, oregano and parsley.
To ensure your herbs grow well, it's important now to overwater them. Our advice? Regularly feel the soil with a finger before watering and only add a splash if it’s dry to the touch.
Want more inspiration? Check out the best herbs to grow in your garden for more brilliant ideas.
-
 Do you need to chit potatoes? Find out what the experts say
Grow Your Own Learn how to chit potatoes before planting them in the ground and you’ll be on your way to getting an earlier and bigger harvest
-
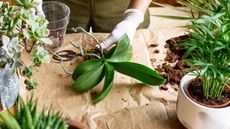 What causes orchid root rot and how do you solve it?
Plants Discover the causes of orchid root rot so you can prevent this common problem from killing your plant


