Latest

-
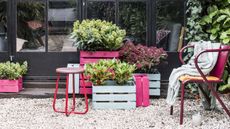
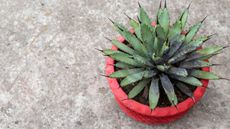
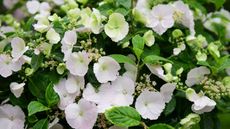
Best winter plants for pots: 17 bright ideas for cold-weather containers
Plants These winter plants for pots will inject plenty of seasonal interest into your garden
-
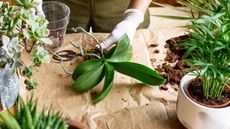
What causes orchid root rot and how do you solve it?
Plants Discover the causes of orchid root rot so you can prevent this common problem from killing your plant
-

How long do hot tubs last? The experts reveal what to expect
Outdoor Living Knowing how long different hot tubs last – from acrylic to inflatable – can help you decide the type to invest in
-
How to protect plants from wind damage and help your garden survive bad weather
How To Our expert tips on how to protect plants from wind damage will help when high winds are threatening to strike
-
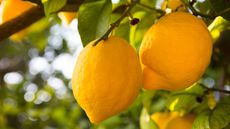
Expert tips on how to grow a lemon tree – both indoors and out
Grow Your Own Find out how to grow a lemon tree with our guide to citrus care and enjoy these fantastic aromatic plants in your plot
-
Look out for these common houseplant diseases to keep your indoor display looking its best
Plants Get the lowdown on these houseplant diseases – including tips on identifying and preventing them
-

How to season a pizza stone: get set for cooking on the barbecue
How To If you’re cooking pizza on the BBQ, you’ll need to know how to season a pizza stone. Get the lowdown
-
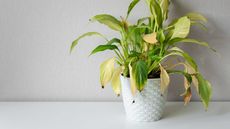
Why is my orchid dying? The experts explain what not to do when caring for these exotic plants
Plants Learn the main causes of orchid death so you can keep your indoor display looking beautiful
-
Why do houseplants die? 5 common reasons, and how to avoid them
Plants The experts reveal the biggest culprits behind houseplant death – so you can keep your collection happy and healthy
-
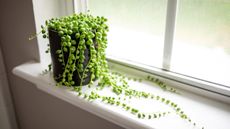
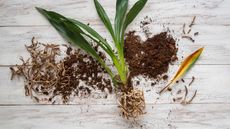
Should you propagate string of pearls in soil or water? Experts offer their advice
Plants String of pearls is one of the most popular indoor hanging plants, so learn how to propagate it with our expert-led advice and boost your collection for free
-
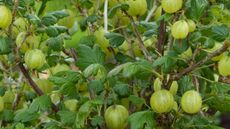
How and when to carry out gooseberry pruning for a bumper fruit crop
Grow Your Own Learn all about pruning gooseberry bushes to help ensure your plant provides a veritable bounty of berries year-after-year
-

5 signs it’s time to replace your trampoline, according to the experts
Kids Wondering when to replace your trampoline? These are the warning signs to look out for so you can keep your kids safe
-
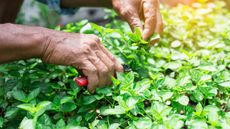
Should you prune mint? Experts explain the benefits
Grow Your Own Learn how to prune mint correctly and when best to do it to keep your plant healthy
-
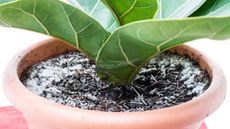
What causes mold on houseplant soil and how do you get rid of it?
How To Curious to know what causes mold on houseplant soil? Follow these expert tips and learn how to prevent it
-
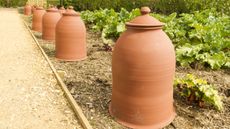
When is the best time for forcing rhubarb and how do you do it? Expert tips for early harvests
Grow Your Own Discover how to enjoy an early crop of tender rhubarb stems in spring by forcing rhubarb plants in winter
-

Pizza oven vs pizza stone: which is the best way to cook slices in the yard?
Outdoor Living Wondering about the pros and cons of a pizza oven vs pizza stone on the BBQ? This is the lowdown
-

How long do orchid blooms last? Orchid experts reveal the answer
Plants Learn how long orchid blooms last, as well as tricks to prolong the display, so you can relax and enjoy their color and beauty
-
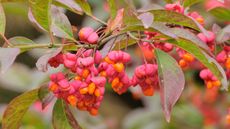
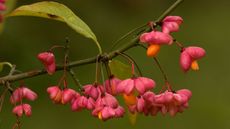
Euonymus care and growing guide: expert tips for these shrubs
Plants Grow euonymus successfully in your backyard with this practical advice on planting, pruning, and more
-

January gardening jobs: 13 top tasks to start the year
Gardens Get the new year off to a good start with our essential January gardening jobs
-
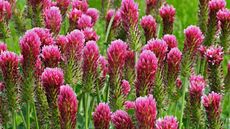
What to plant in January: 14 flowers and shrubs to add to your garden this month
Plants Our list of what to plant in January will get you ready for a beautiful display this year – including bare root perennials and top seeds to sow
-

Can you grow a pomegranate tree from seed? Experts reveal how to get the best results
Grow Your Own Find out how to grow pomegranates from seed and you'll soon be growing your own delicious fruit
-

Morning glory care and growing guide: expert tips for these climbing beauties
Plants Find out how to grow morning glory and moonflower climbers with prolific, trumpet-style petals and well supported, quick-growing vines
-
Vegetables to plant in January: 12 crops to sow and grow this month
Grow Your Own Get cracking with the best vegetables to plant in January, including banana shallot, celeriac, eggplant and quinoa
-

Gas vs wood-fired pizza ovens: top tips to help you choose
Outdoor Living Can't decide between gas vs wood-fired pizza ovens? With help from the experts, we round up the pros and cons of both
-
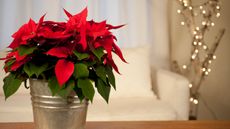
Why are my poinsettia's leaves falling off? Experts reveal the common causes
Plants Wondering why your poinsettia's leaves are falling off? Plant experts offer their top tips for rescuing the Christmas favorite
-
Best garden shrubs: 10 stunning varieties to plant in your yard
Plants There are lots of brilliant garden shrubs – here are some of our favorites, including new varieties
-
Edible weeds: 15 unexpectedly tasty plants to enjoy as crops
Plants These 15 edible weeds will enhance your kitchen garden and deliver quick and easy nutrition, variety and color
-

Why are my orchid leaves drooping? 6 reasons to look out for
Plants Find out what is causing your orchid leaves to droop and the best solutions recommended by plant experts
-
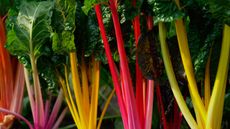
Ornamental edibles: 10 beautiful varieties for your vegetable plot
Grow Your Own Rethink your garden and use the space to grow ornamental edibles that look as good as they taste


